Mittwoch, 18. März 2015

Urban Hunk

This Tut is the product of my fantasy own
on 19 /03/2015
© The Tuts this lies solely with me
  It may not be copied and offered for download on the other side are
Any similarity is purely coincidental.I wrote it with Corel X3, but also goes with other versions
The material used is subject to the creator and artist
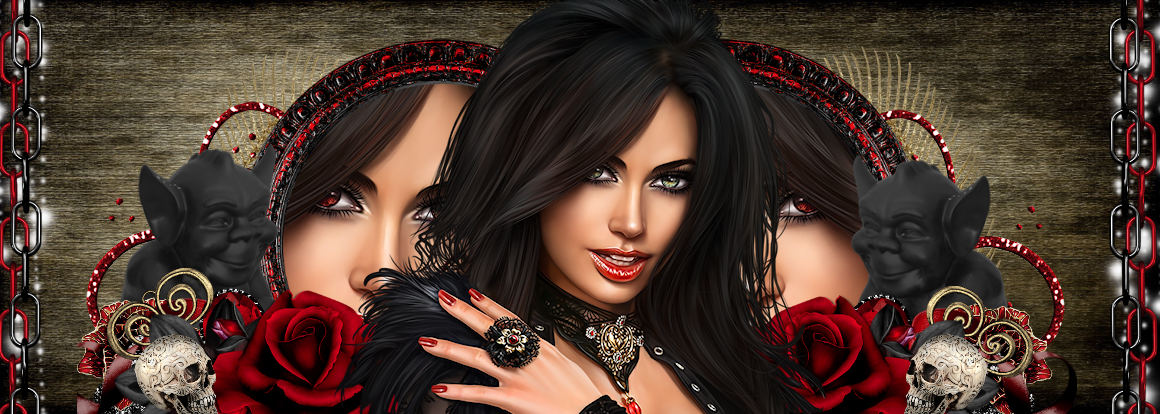
For doing this you need the PTU Urban Hunk
What you can buy HERE
mine is from
 VeryMany
 you can get HERE
 you need a mask of your choice
 if you have everything together so we can begin

1.
Open a new page in the size of 700 x 650 in
 transparency

2.
 Copy
Urban Hunk (18)
paste as new layer
Image Resize to 40%
move it slightly to the left

3.
 Copy
your tube
and paste it into your image
Resize Image
Flip image vertically

4.
 Copy
Urban Hunk (2)
paste as new layer
Image Resize to 40%
Flip image vertically
move it to the right
under Raster2

5.
 Copy
Urban Hunk (13)
paste as new layer
Image Resize to 30%
move it to the right
under Raster3

6.
 Copy
Urban Hunk frames (1)
paste as new layer
Image Resize to 60%
move it under Raster4

7.
 Copy
Urban Hunk (14)
paste as new layer
Image Resize to 35%
move it to the links below
in the corner

8.
 Copy
Urban Hunk (12)
paste as new layer
Image Resize to 50%
move it under Raster4

9.
 Copy
Urban Hunk (70)
paste as new layer
Image Resize to 50%
move it under Raster6

10.
 Copy
Urban Hunk Papers (1)
paste as new layer
move it under Raster9
Seeking Get your mask
the'd like to take you
then go to
levels
New Mask Layer
image
Add mask image
now turn your mask on
chop must at
Luminance of the source
and then press ok
summarize
Merge Group
Image Resize to 85%
move it a bit to the right
Duplicate level
Flip image vertically
  put your watermark and copyright
with your picture on
Levels of grouping
 summarize and save as JPG or PNG

Beach Sand


This Tut is the product of my fantasy own
on 18 /03/2015
© The Tuts this lies solely with me
  It may not be copied and offered for download on the other side are
Any similarity is purely coincidental.I wrote it with Corel X3, but also goes with other versions
The material used is subject to the creator and artist
For doing this you need the PTU Beach Sand
What you can buy HERE
mine is from
 VeryMany
 you can get HERE
 you need a mask of your choice
 if you have everything together so we can begin
 
 
1.
Open a new page in the size of 700 x 650 in
 transparency
 
2.
 Copy
Peach Sand (24)
paste as new layer
Image freely rotate 90degrees close links
Image Resize to 56%
move it to the center
 
3.
 Copy
your tube
and paste it into your image
Resize Image
place it in the middle
 
4.
 Copy
Peach Sand (10)
paste as new layer
Image Resize to 50%
move it to the left
under Raster2
Duplicate level
Flip image vertically
 
5.
 Copy
Peach Sand (2)
paste as new layer
Image Resize to 50%
move it under screen3
and a little to the right
move
 
6.
 Copy
Peach Sand (20)
paste as new layer
Image Resize to 30%
move it to the left
on Raster2
Duplicate level
Flip image vertically
 
7.
 Copy
Peach Sand (72)
paste as new layer
Image Resize to 55%
move it to Raster2
 
8.
 Copy
Peach Sand (66)
paste as new layer
Image Resize to 50%
move it under screens7
take your eraser
and Erase everything away
what the bottom and top
 look over it
 
9.
 Copy
Peach Sand (83)
paste as new layer
Image Resize to 25%
move it to the left
and put it on your tube
below
Duplicate it still 2 times
and gave it side by side
 
10.
 Copy
Peach Sand (82)
paste as new layer
Image Resize to 20%
move it to the left
on raster9
Duplicate level
Flip image vertically
 
11.
 Copy
Peach Sand (94)
paste as new layer
Image Resize to 40%
move it to the right
under Raster6
Duplicate level
Flip image vertically
 
12.
 Copy
Peach Sand (78)
paste as new layer
Image Resize to 30%
move it to the left
under Raster9
Duplicate level
Flip image vertically
 
13.
 Copy
Peach Sand (40)
paste as new layer
Image Resize to 20%
move it to the left
under Raster12
 
14.
 Copy
Peach Sand (1)
paste as new layer
Image Resize to 30%
move it to the right
 
15.
 Copy
Peach Sand (73)
paste as new layer
Image Resize to 50%
move it to the left
under Raster3
 
16.
 Copy
Peach Sand (79)
paste as new layer
Image Resize to 25%
move it to the left
under Raster13
Duplicate level
Flip image vertically
 
17.
 Copy
Peach Sand (69)
paste as new layer
Image Resize to 55%
Image freely rotate 90 degrees to the left
move it under Raster10
 
18.
 Copy
Peach Sand (63)
paste as new layer
Image Resize to 25%
move it to the left
 
19.
 Copy
Peach Sand (44)
paste as new layer
Image Resize to 25%
move it to the left
under Raster18
 
20.
 Copy
Peach Sand (32)
paste as new layer
Image Resize to 20%
move it to the left
Up in the corner
 
21.
 Copy
Peach Sand (100)
paste as new layer
Image Resize to 65%
move it to your image
in the middle
and Raster14
 
22.
 Copy
Peach Sand Papers (28)
paste as new layer
move it to the last
put on your image
  (Under Raster5)
Seeking Get your mask
the'd like to take you
then go to
levels
New Mask Layer
image
Add mask image
now turn your mask on
chop must at
Luminance of the source
and then press ok
summarize
Merge Group
  put your watermark and copyright
with your picture on
Levels of grouping
 summarize and save as JPG or PNG
 

Sonntag, 1. März 2015

Very Emo

This Tut is the product of my fantasy own
on 01 /03/2015
© The Tuts this lies solely with me
  It may not be copied and offered for download on the other side are
Any similarity is purely coincidental.I wrote it with Corel X3, but also goes with other versions
The material used is subject to the creator and artist
For doing this you need the PTU Very Emo
What you can buy HERE
mine is from
  verymany
  you need one of these tubes  
 Licences  you can get HERE
you need a mask of your choice
 if you have everything together so we can begin

1.
 Open a new page in the size of 650x600 (transparent)

2.
 seek for yourself a mask of your choice
get them into your PSP and niminiere it only one time
Copy
first
Kristin-Very Emo Paper10
Copy and paste as a new layer
now go on planes
New mask layer from image
looking for you now your Mask
and brightness of the source must be a tick in it
and then click ok
summarize
Merge Group
I'm still a paper taken
if you want to feel free to make it
then repeat it with your mask

3.
Kristin-Very Emo Wire
Copy and paste as a new layer
Image Resize to 90%
Shadow of your choice

4.
 Kristin-Very Emo Bow4
Copy and paste as a new layer
Image Resize to 20%
move it to the left
Shadow of your choice
Duplicate it another 5 times
and move it to where it suits you

5.
 Kristin-Very Emo Frame1
Copy and paste as a new layer
Image Resize to 76%
move it under Raster2
Shadow of your choice

6.
 Kristin-Very Emo Splatter
Copy and paste as a new layer
move it under Raster2
Shadow of your choice

7.
 Kristin-Very Emo WordArt
Copy and paste as a new layer
Image Resize to 85%
move it under copy of screen3
Shadow of your choice

8.
 Kristin-Very Emo Butterfly1
Copy and paste as a new layer
Image Resize to 25%
move it to the top right
Shadow of your choice

9.
 Kristin-Very Emo Butterfly2
Copy and paste as a new layer
Image Resize to 15%
Move next Butterfly1
Duplicate level
Flip image vertically
move it to the other Buttyfly (copy)
Shadow of your choice

10.
 Kristin-Very Emo Lips
Copy and paste as a new layer
Image Resize to 20%
Image freely rotate 25 degrees to the left
Shadow of your choice
Duplicate level
move it to the left

11.
 Kristin-Very Emo Bear
Copy and paste as a new layer
Image Resize to 30%
move it to the left
Shadow of your choice

12.
 Now copy your Tubes
my is Very Many
and move your tubes in the middle of the picture
Resize Image
Shadow of your choice
 put your watermark and copyright
with your picture on
Levels of grouping

 summarize and save as JPG or PNG